 |
| Safe and sound in the new place... Professor Shandy Tanglefoot's Overcompensatory Death-Ray of Doom, Big Mike and The Faraday Galvanic Field Gun, Tex Wingspan, Hydrothermicopter, British Shock Troopers, HMSW Gargantua and Bazalgette Light Armoured Perambulatory Contrivance |
At last my daughter and I are settled in Hataitai, Wellington - and I can finally relax!
We moved on Monday in torrential rain and high winds, to a house one approaches up a steep, winding, very exposed path... The bookcases in particular were fun...
 |
| Flunk, Steam-Tank-Engines, Pantagruel and Steam Boat. |
Anyway, be that as it may, we made it and the unpacking began.
 |
| Two Gatling guns and a piston broke off Gargantua... Minor damage really. |
 |
| Gargantua's 'mouth' - missing a gun |
 |
| ...the second missing Gatling gun... |
I admit, I was expecting some damage to my models, and so I was very pleasantly surprised to discover almost everything arrived unscathed. Predictably, perhaps, HMSW Gargantua needed a little repair (and there was a minor issue with Professor Shandy Tanglefoot's Overcompensatory Death-Ray of Doom) but that was all.
 |
| The piston is quickly put back in place with a couple of dobs of superglue. |
 |
| Fixed up and ready for battle! |
But it hasn't all been moving house and fixing machines. I have actually found a little time to continue with Lord Smudgington Smythely-Smythe's Hydraulically Motorvated Sextupedal Land-Traversing Vacational Domicile...
I finally started work on the dome-roof of the engine room. As you will probably be aware by now, this is inspired by the work of Joseph Paxton - the engineer responsible for the greenhouses at Chatsworth House and later the Crystal Palace.
 |
| An exact-size drawing of the dome end, complete with hole-punches for each pane size. |
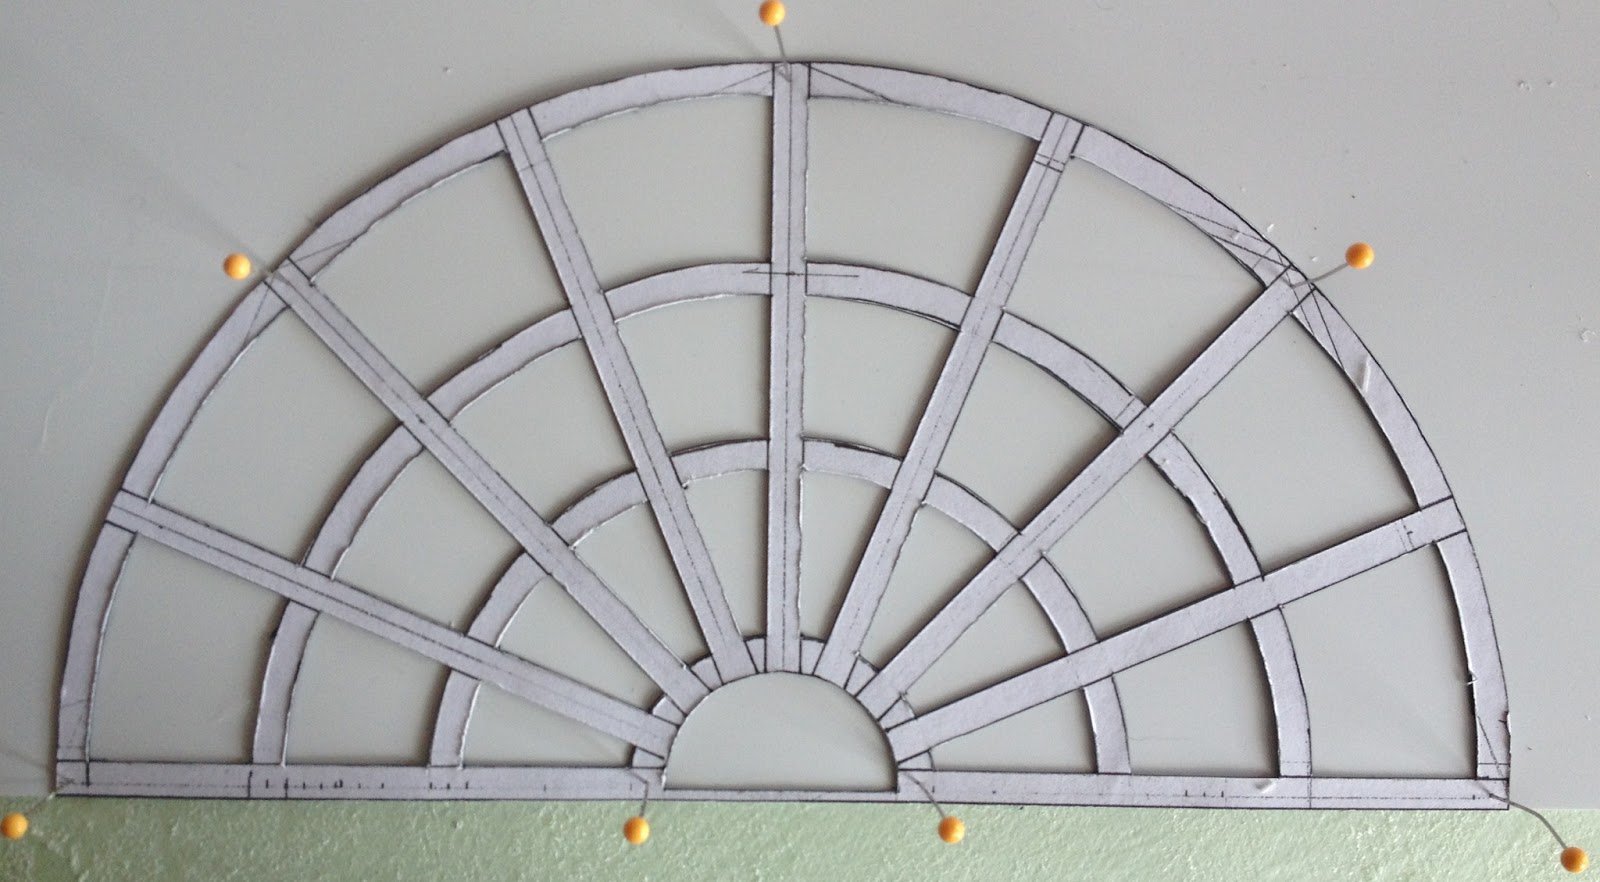 |
| The basic frame, in cardboard, is pinned to a sheet of styrene. |
The plan is to complete a fully removable dome of glass and iron. I have started with the ends, and will follow with the girders that form the curved roof.
 |
| The dome, drawn on styrene... |
 |
| Holes are punched out... |
Using a copy of my exact-size drawing, I made a card template of the basic frame. I had already planned which size hole-puches to use in order to create rounded corners within the window panes.
 |
| The holes... |
 |
| Windows are trimmed to shape and the dome is cut out. |
Once the frame was cut- and punched-out, I built up the ironwork with simple strips of plastic and many, many rivets. Using more than one layer of 'iron' gives an impression of strength and makes the model so much more interesting to look at, yet it's not really a lot of work.
 |
| Strips are added. |
 |
| ...and the rivets... |
I will be making the corresponding dome for the other end of the engine room next, detailing the insides before starting on the roof.
This brings me to the Rivet Count...
This end of the roof has no fewer than 385 rivets. (Count 'em!) bringing the total so far to:
7,055!
...with so many more yet to come!
Anyway, with rivets in place, I added a quick bit of paint and so on, glued a sheet of clear acetate to the back (later to be enclosed with interior ironwork) et voila!
 |
| The painted dome. |
So there you go - I think the dome looks great so far and I hope these pictures give you all a clearer idea of where I am going with this.
 |
| The dome, held in place by the Hand of The Colonel... |
More soon!
All the Best!