A brief tutorial on building wooden buildings for the Wild West. Dimensions are for an approximate scale of 1:60, and are open to interpretation.
Materials you'll need:
- Balsa sheet, 2mm thickness – for walls, trims and board walk. Sheet should be about 100mm wide, 600mm long.
- Balsa sheet, 1mm thickness – for doors. Just a small piece.
- Basswood strips, 1mm thick, 2.5mm wide – for door frames, window frames and signage.
- Basswood rods, 4mm square – for posts.
- 5mm foam-core board, preferably black – to form the body of the model.
- Thin black card – to form the false front and roof.
- Acetate sheet – for window glass.
- Wire – for door handles.
- Small-gauge corrugated card – for tin roof.
- Brass sheet – for awning.
- Plastic rod and card – for smokestack.
- PVA, balsa cement and polystyrene cement.
- Water-based wood stain. I use Resene's Walnut interior stain. Other colours are available.
- Acrylic paint – a light sand colour, black, your choice of metallic, your choice of two contrasting complimentary colours.
- Dressmaking pins.
Step One – Prepare The Balsa.

Using an ordinary HB pencil and a straight-edge, divide the 2mm balsa sheet into planks, 4mm wide (along the grain).
When building Leadwood, a very big project, I set up a drawing board as a jig for this purpose – two cardboard right-angles, marked at 4mm intervals, support the balsa strips and allow me to very quickly mark out many pieces at a time.
At the end of this sheet, at right angles to your lines, mark two 50mm wide strips to be the board walk. Using a fine pencil (I use a 0.5mm clutch pencil) dot-in rows of 'nails' about 5mm from the edges. I do this freehand to deliberately create an untidy line.
Mark a smaller sheet of balsa as 8mm planks, as above, to be used on the false front of the building.
Using a fine pencil (I use a 0.5mm clutch pencil) construct two doors on the 1mm balsa sheet. The grain should run up/down the doors. These will be very fragile – do not press hard. My doors are 18mm wide, 35mm high, with component planks being 4mm wide.

Paint the above pieces with wood stain. I find it is easiest and quickest to do this if you paint them with a thin coat of water first. Next, immediately wipe the pieces with a cloth or tissue paper so that the stain is not too dark and the grain of the wood starts to show through. Do the same to prepare your basswood rods and strips.
Wait for the stain to dry thoroughly. The whole look of the model depends on this.
With a large, soft brush, drybrush all wooden materials with a light, sandy colour. I use Resene's 'Rob Roy'. Don't be too delicate with this.
You should now have some nice looking wood!
Step Two – Construct the shape of the building.
Decide what size your building will be, mark out front, back, sides and base on foam-core board and cut them out. My sides are 50mm high, 120mm long. My front and back are 100mm wide, 50mm high at the edges, peaking in the middle 85mm high. The base is the same width as the front (100mm) and 45mm longer than the whole model will be, remembering that the front and back add their 5mm thickness to the lengths of the sides. (So my 120mm sides will become 130mm when constructed. My base is therefore 175mm long to accomodate the board walk.)

Cut a false front from thin card. This will be the same width as the front (100mm) and two storeys high (100mm).
Glue and pin all foam-core pieces together. Allow to dry.
Remove all pins. Glue card false front to the front of the building.
Step Three – Balsa cladding.
Carefully mark and cut all balsa pieces to clad the building. Cut doors and windows so that they line up along their top edges. My doors are 18mm wide, 35mm high. The windows are 24mm high, 20mm wide. Note that doors start above the 'ground'. The back piece for the false front is an 'off cut' when cutting out the back of the building.

Cut occasional planks along the board walk shorter than others to create a ragged look. A light wash of watered-down wood stain dulls the edge. No need to drybrush again unless you really want to.
Starting with the board walk pieces, glue all balsa cladding onto the model.

Step Four – The Roof Structure
Cut a piece of card and score down the middle to form a roof. This should not protrude over the edges of the model. Glue it down with PVA along all sides. It is important that it is a good fit and sits nice and flat against the model.

Step Five – Balsa detailing.
Cut a number of 4mm strips from your left-over sheet. Also cut some 8mm strips. Dull the cut edges with watered- down wood stain and wipe dry.
Starting with the false front, glue 4mm uprights to the outer edges of front and back. Use Balsa cement to glue balsa to balsa. For all other materials, use PVA.

Glue 8mm strips to the sides and top. Note the notch I have cut out to fit around the board walk.

Working around the model, add details where you see fit, placing vertical pieces first, then horizontal, then gable ends. Glue these with balsa cement, being careful not to smear glue where it may be seen – it will dry shiny.
Step Six – Window Detailing
I have found that adding curtains, blinds and other details to the windows, instead of simply leaving black holes, really improves the whole look of the model. When making Leadwood, there were a great many windows and it was tedious work, but I am very glad I did it. Compare the Leadwood buildings to my earlier work in “Old Cowboys” and you'll see what I mean.
Using two contrasting shades (here red and orange) and starting with the darker, quickly paint a rough outline of curtains. These should be 'sketchy', allowing some black to show through. (If you have used white foam-core, you will need to paint your windows black first.) Now paint streaks of the lighter tone over the top to give the impression of folds in the curtains.
Don't get too precious about this stage – they will be obscured behind window frames and glass.

When the curtains are dry, cut panes of glass from acetate sheet to fit the windows. Smear them with a thin film of PVA and stick them in.
Acetate sheet is available in graphics/stationery suppliers in A4 size for about 60cents a sheet.
Now cut basswood strips to form the window frames. Basswood is much better than balsa for this job. It is straight and strong, even when cut very thinly, whereas balsa tends to bend and breaks easily.
Start with the inner pieces of window frame, gluing them directly onto the acetate with PVA. When lining up several windows to match on a building, use the planking lines of the walls as a guide. You should attach the window sill first, by laying a piece of basswood on its edge, then vertical pieces, then horizontals.
Now glue the outer frame to the building, overlapping the edge of the window very slightly, to 'tidy up' the edge.
It really speeds things up to cut a lot of pieces at once. When I was building Leadwood, I taped down multiple strips at a time with masking tape, marked across them all at the required intervals and cut them. At one point I had several hundred pieces, sorted into lengths, waiting and ready.
Step Seven – Door detailing
Before gluing your door pieces into place, trim them to fit nicely and paint a door plate and hinges onto them. These are just very simple shapes, painted black first, then picked out with metallic paint. This could be silver, brass, gold, whatever seems right.
Now make door handles. Take a small piece of thin wire (about 20mm long – could be a piece of paperclip) and make a right-angled bend about 4mm from one end.

Glue the doors into place and, using a pin, make a hole all the way through the door and the foam-core behind, where the door handle will go. You might need to wiggle the pin a bit to make the hole wide enough, but be very gentle. Push the door handle through, paint it black and pick it out with metallic paint.
Place a step at the foot of any door leading onto the board-walk.
Make steps if required for other doors. I construct these from bits of off-cut balsa planking. You'll need four pieces; a top step, 25mm long by two planks deep, a lower step 25mm long by three planks wide, and two supports, each a plank narrower and not quite as long as the step above. These can be marked with 'nails' as per the board-walk.

Glue the steps together using balsa cement, making sure to get everything straight. Glue the final assembly to the building using balsa cement.
Use basswood strips to construct a door frame. As with windows and walls, place verticals first, cutting them to be very slightly shorter (1mm at most) than the door and gluing them into place to slightly overlap the door. Now glue on the top piece.

Step Eight – Roof Detailing
For a tin roof, cut strips of fine-corrugated card into 40mm widths and paint an appropriate colour.
I found a large sheet of this in a graphics supplier's, painted the whole sheet dark grey, then drybrushed light grey, then lightly and unevenly drybrushed with a rust colour before cutting the sheet into strips. I now have a ready supply whenever I need it.
Cut four strips to length for your roof. Glue the first strips on, overhanging the edge of the roof by about 10mm. Then glue the next strips above these, aligning them to the top edge of the roof. Use PVA, making sure you have a good contact where the sheets overlap. They will have a tendency to curl, so keep smoothing them down until they stay.

To make the ridge flashing, cut a thin piece of card the length of your roof and 20mm wide. Score down the centre, paint to match your roof and glue down with PVA. Like before, this may curl at the edges/corners, so keep checking it until it is firmly stuck.
Step Nine – The Awning
Start by marking where your posts will go. Cut the board walk planks back to fit 4mm square posts.
I've chosen to put only three posts on this model, fairly evenly spaced.
Cut basswood posts so that their tops will be slightly below the level of the imaginary 'second storey' as marked on the false front. This will mean that the awning sits on a gentle slope. Be careful not to make this slope too sheer – you'll need to get miniatures in and out during games.
Glue the posts in place and support them with a 4mm wooden plank at the top and angled planks at the sides. I suggest you cut the side planks longer than they need to be and trim them back until you get the angle right.

While the above stages are drying, flatten out a piece of brass sheet from a tomato puree tube (or you could use paper) and cut a rectangle 8mm longer and 4mm deeper than the whole awning needs to be.
From the underside of the sheet, score lines to mark where the sides and front will hang down. Use a rounded instrument such as a thin knitting needle or a hard pencil – do not use a knife. Where these lines cross at the two front corners of the sheet, cut out the 'square' they produce. Fold the edges down. Also score 'planks' to be shown through the cloth as required. I have scored one imaginary plank, just off-centre.
Paint the awning and glue into place. The sheet may need a little gently bending to shape it properly. I've painted mine white, washed with a dirty grey and heavily drybrushed more white.
Step Ten – The Smokestack
Using two thicknesses of plastic tube – one to fit around the other – cut a wide ring about 1mm thick and a length of thin tube about 25mm long. Also cut a piece of thin plastic board about 8mm square.
Cut the end of the thin tube at an angle to match the slope of the roof. I suggest you check at this stage, making very slight adjustments until you are happy the smokestack will stand up straight.

Glue the ring around the tube, about 1-2mm from the top and glue the whole assembly to the square piece.
Paint black, drybrush dark grey and stick in place on the roof, using the corrugations as a guide to set everything straight.
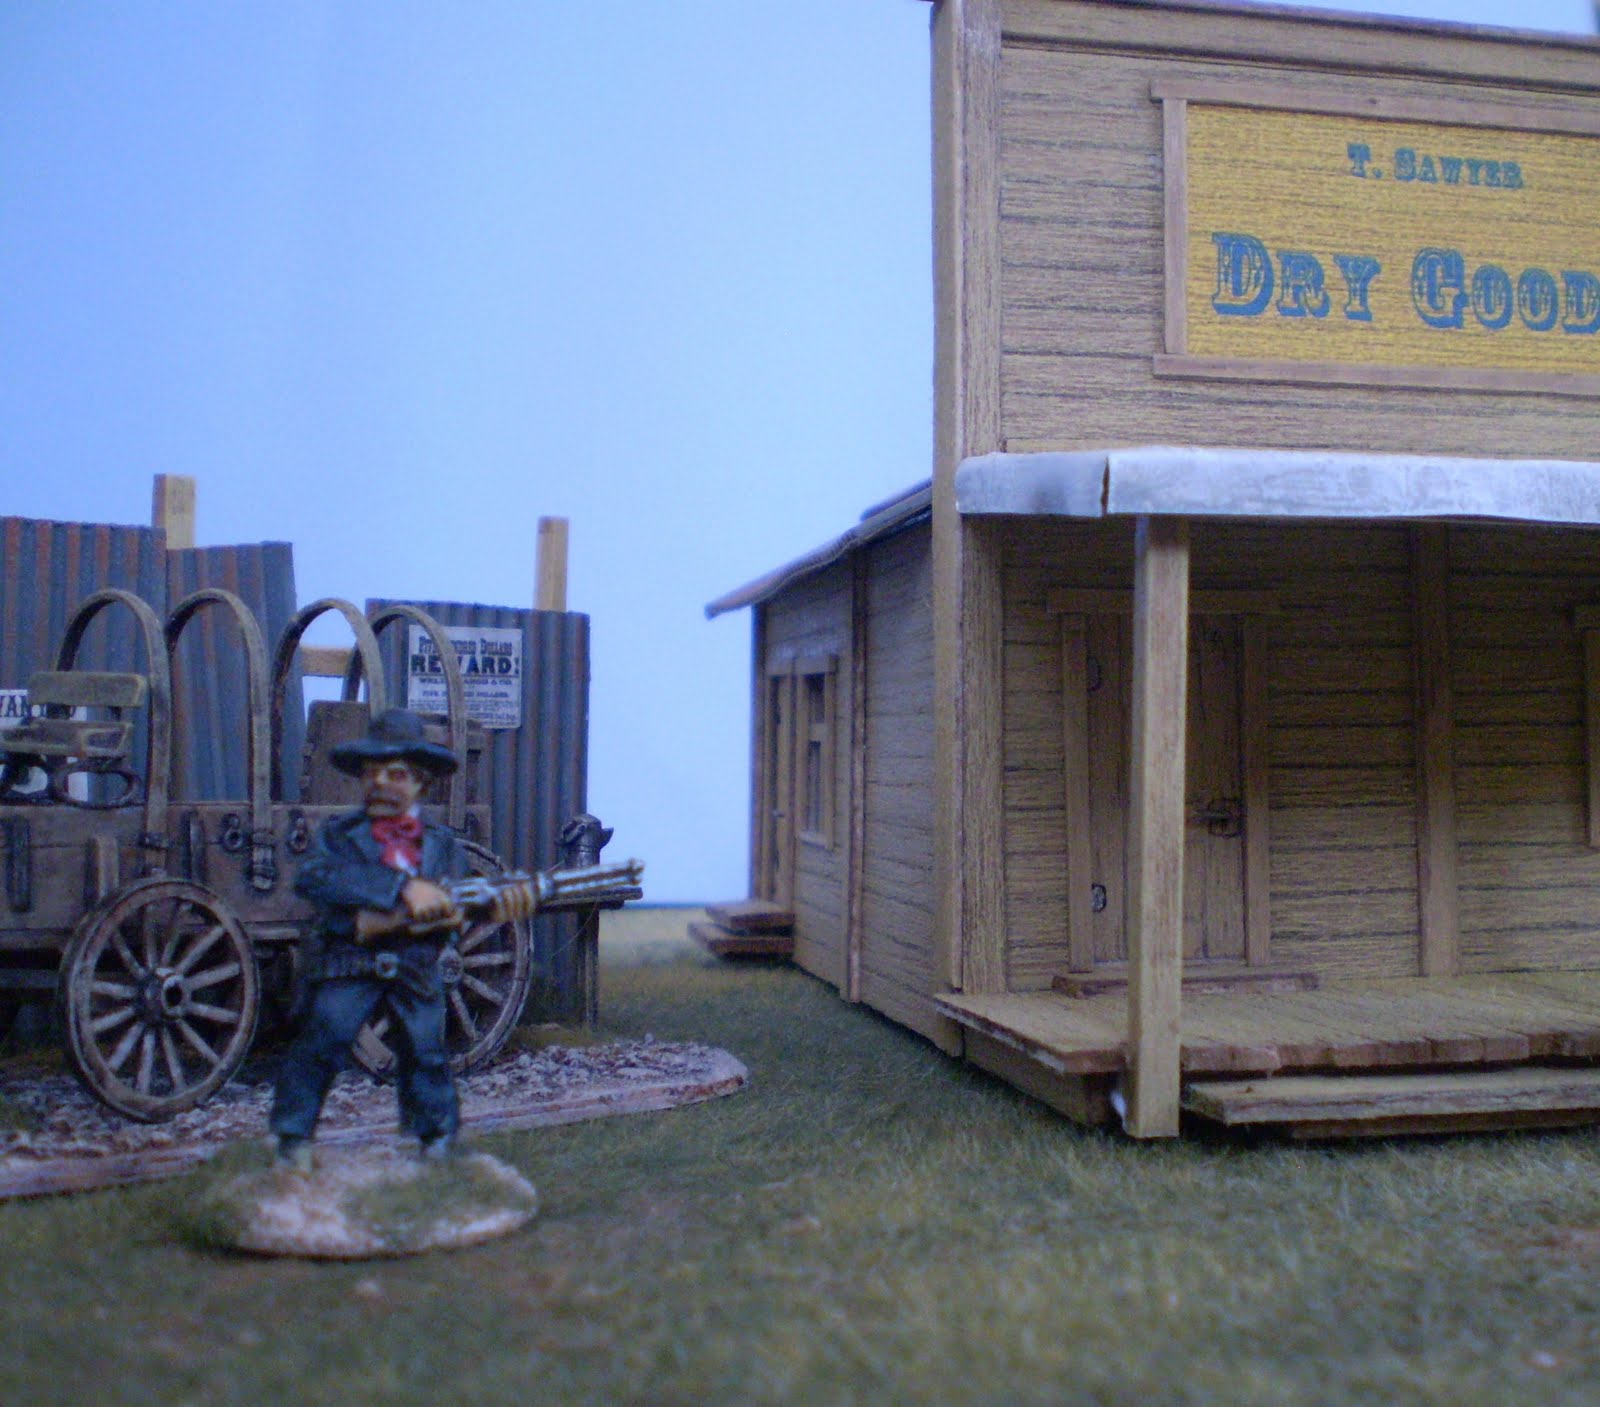
Step Eleven – The Sign
To make the sign, I first colour scan a sheet of prepared balsa wood 'planks' and print it onto paper. I then feed this paper back into the printer and design signs to whatever sizes I want, with whatever fonts, on the computer. These can then be printed directly onto 'planks'.
Using the boards on your building to line it up, glue your sign into place.

Glue a basswood border around the sign, starting with the bottom, then the sides, then the top. Make sure each piece slightly overlaps the paper of the sign.
Your building is now complete.