Thursday 31 January 2013

In All Furnace, That's A Lot of Rivets...

Hi, All!

Boiler and Furnace, together at last!

It's a gorgeous, hot, sunny day. I've been swimming in the sea, enjoying the weather, and I've just got enough time to post a bit of a blog thingummy before pub time!

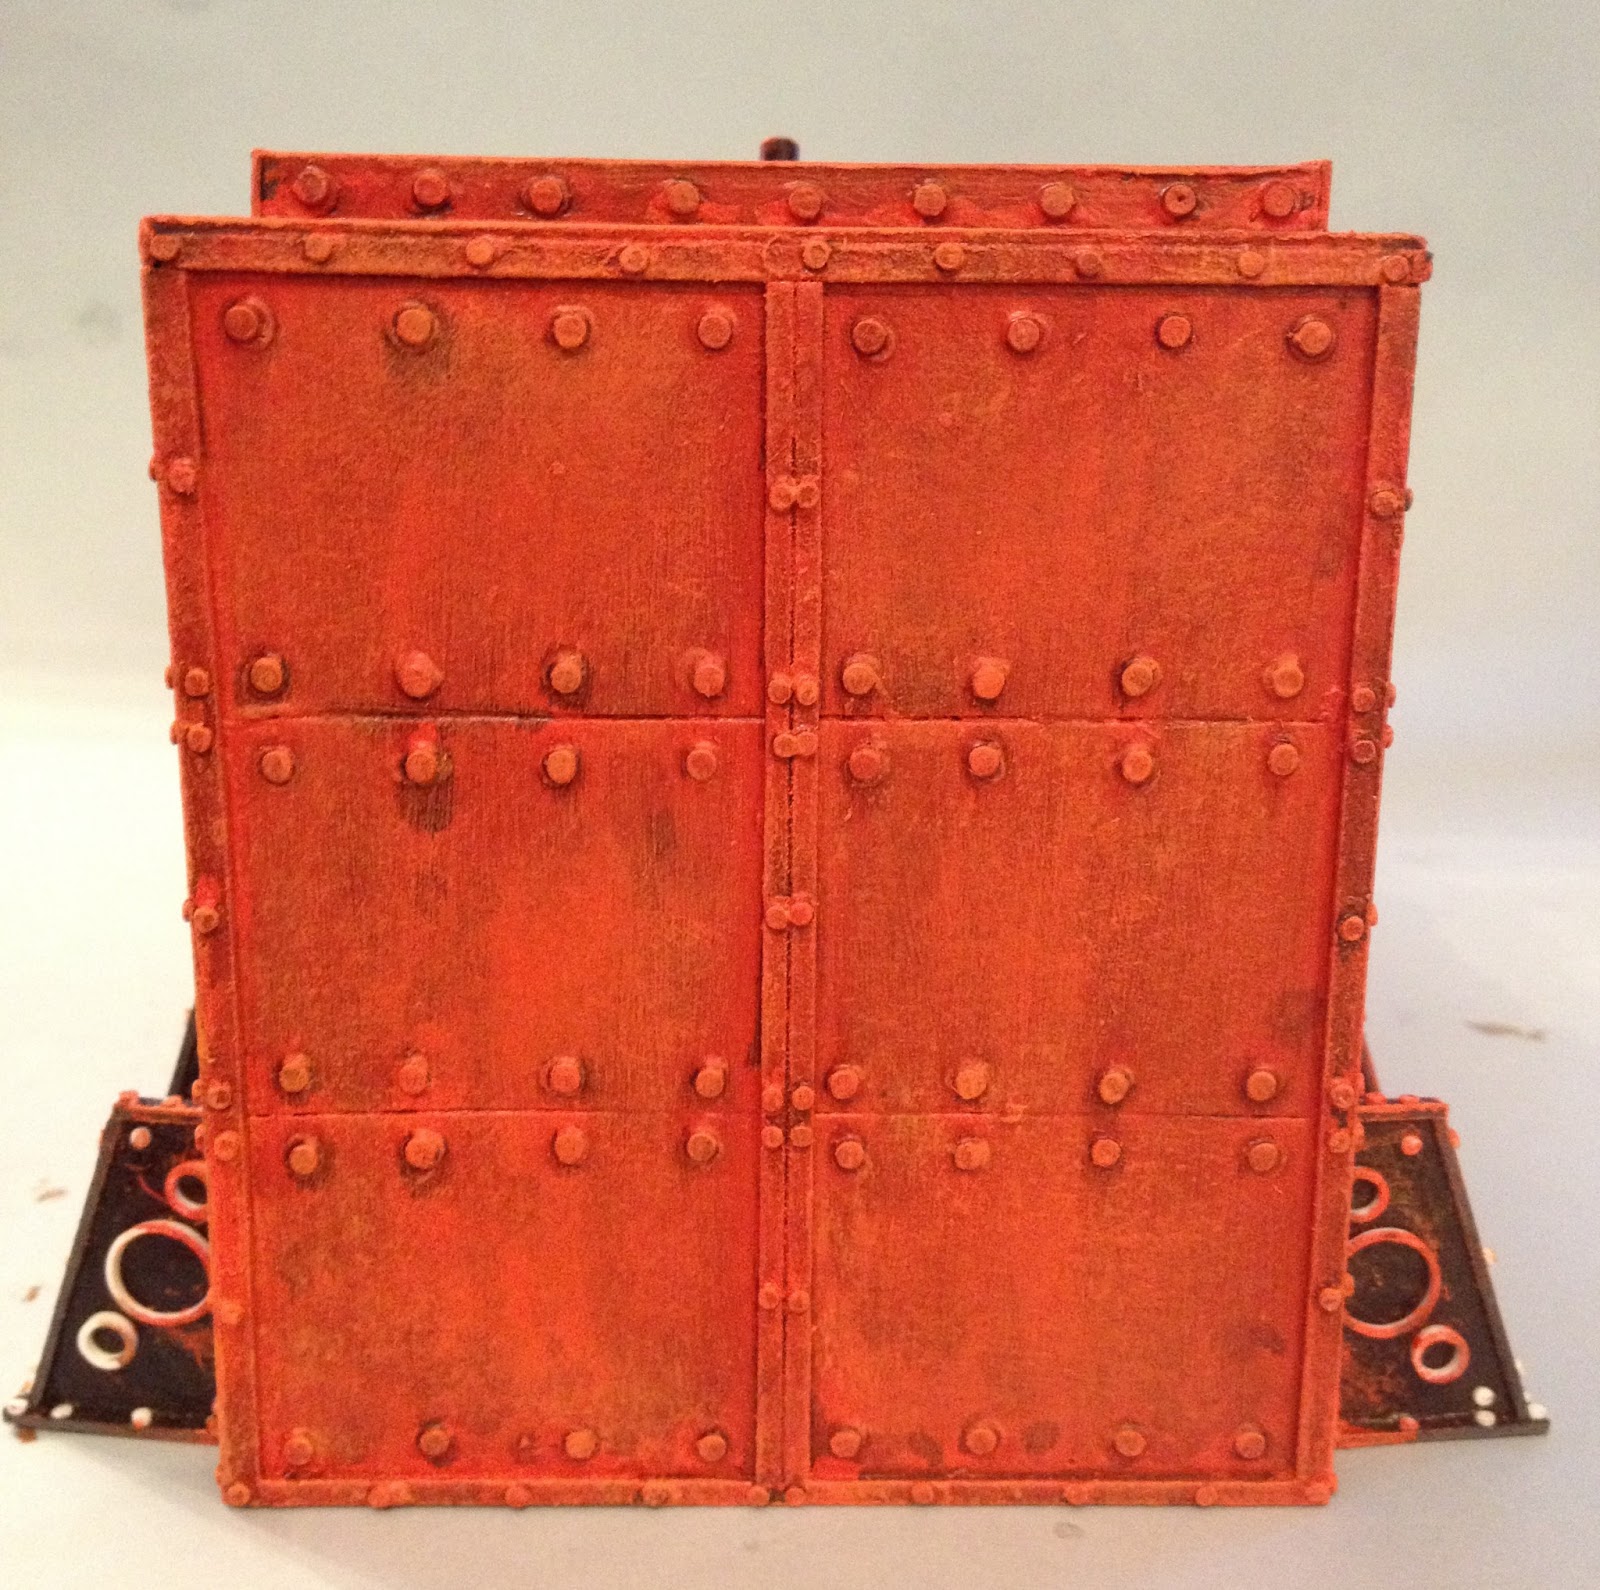
The finished boiler, resplendent in red, green and gold! I'm very happy with how this is looking.

Since my last post, I've finished painting the boiler and have constructed and painted the furnace. Soon I'll be adding all sorts of other machine parts, completing the engine room and moving on to the next part of this gigantic project...

Paint pot evolution: Top left - the paint pot, before mutilation. Top right - troublesome writing on the reverse. Bottom left - the centre is cut from a spare lid. Bottom right - the writing is successfully covered.

The furnace started life as a paint pot exactly like the one whose lid formed the front of the boiler. I did try constructing a square furnace from card but it wasn't quirky enough. So I started again. A minor problem posed by the paint pot was that the back of it had loads of raised writing. Fortunately, these pots are designed to stack, so by cutting up a spare lid, I was able to cover the back. All it took was a sharp knife and a steady hand.

The furnace is lined with foil to reflect the LEDs I'll build in later. A stand is made from plastic. Stand and paint pot have holes cut in the bottom so I can push the LEDs up inside later.

I have decided to build lighting into the furnace, which will be tinted to be redder than the other LED lights around the rest of the vehicle. These will be inserted through holes in the bottom of the furnace later.

The furnace takes shape. This was built up using my patented 'stick bits on until it looks right' technique. I hereby give permission for you to adapt this method for your own projects.

Slots were cut into the front of the furnace, through which the engineers can view the interior. These were glassed over with acetate, then a face was constructed around them with plastic board and the inevitable rivets...

The finished furnace, pre-painting.

Push pins, thin card panels and other details were added as I thought of them. The four circular outlets will be used for something or other much later. Who knows at this stage? Not me!

Boiler and furnace are checked together.
During painting. It looks kind of Soviet at this point...

Painting was fast and simple. The whole thing started out black, but I added red, green and gold to tie it in with the boiler.

Painted and glorious! Lord Smudgington Smythely-Smythe looks on in admiration. I may add the date of the vehicle's commission to the gold plate.

So: I suppose I should mention the Rivet Count!

The furnace has 155 rivets, bringing the total for the Engine Room to  1322...

And... The total for the walker so far:

2,252 !

Not bad, eh? Of course, there's a very long way to go! Next up: Chimneys!

Furnace and boiler together. Big, red and powerful. Just like The Empire, eh what!

So that's it for now... I hear the pub calling to me!

All the Best!

Friday 18 January 2013

I See Red, I See Red, I See Red...

Hi, All!

Looking rather fine... It's amazing how a coat of paint brings a model together.

Just thought I'd jump on the old Portable Difference Engine and give you all a quick update:

Machine details catch plenty of red paint - not a worry at this stage! I find trying to be neat and tidy really slows me down!

The boiler is nearing completion now, and I'm into the painting of it. I've been meddling with modelling since I was a wee nipper, yet it never ceases to amaze me how much of a difference a coat of paint can change a model. All of the odd little bits and bobs suddenly look like they belong together.

These tubes and joints will be black eventually, giving a nice contrast.

I've gone for big, bold red for the engine, with green and gold details. I feel this is sufficiently Victorian in style, while being somewhat flamoyant - in keeping with the outrageous machine it will be part of. Black and copper will add a contrast for various machine parts and as you've seen with the Core-Room over the last few weeks, it will all stand out very nicely against light blue-grey walls and bare wooden floors.

A pointy bit. Because.

I started with the red, painting pretty much the whole model. This took three coats to give a good coverage, followed by a thin brown ink wash and a rich orange highlight. I think the final effect is great - it's nice and solid, with a dirty machine feel to it. As you can see, I have now moved on to the green, which will be highlighted a lighter shade, then followed by the other details.

Sixteen of these discs required six rivets each... That's ninety-six just for these bits. Painted the same as the rest of the boiler, they really look like they belong.

Of course, before any of this could occur, I had to add a few more rivets... 249 of them, to be exact. So today's Rivet Count:

The boiler is up to 1167, bringing the total for the whole project to 2097 !

The back of the smokestack. Rivets were added on all of the banding, which will be green when done.

Anyway, time for me to get on with stuff!

The boiler so far... Looking rather grand, I think!

All the Best!

Monday 14 January 2013

More Chuffin' Rivets!

Hi, All!

The immense engine, well under-way.

This week, more on the progress of:

 Lord Smudgington Smythely-Smythe's Hydraulically Motorvated Sextupedal Land-Traversing Vacational Domicile.
 
When I last posted, I was in the final stages of the Core Room and making a start on the Engine. All that remained for the Core Room was a ladder.

Two simple strips of plastic are cut, rounded off with sandpaper and marked for rungs.

Can't believe I left that unfinished, to be honest! The ladder took me about twenty minutes to make. What a cop-out!

The unpainted ladder, propped in place to check that it fits. Note that even this small piece has thirty rivets!

It was a simple matter to add a couple of brackets, a handful of rivets, paint the assembly and glue it in place. Finally, the room's last wall and LEDs were positioned, et voila!

Painted ladder and handrail in place.

LEDs are positioned behind the portholes.

Once that was done, it was on to the engine!

The finished Core-Room. You'll be seeing this again, later in the project.

As promised, this is going to be an immense piece of machinery. As such, I run the risk of making it look too large or worse - out of scale! The only way to avoid this is to add an abundance of details to give it the correct sense of size. These will include many guages and levers, walkways, ladders, lanterns, perhaps a noticeboard or two - you get the picture. Without such references, this huge boiler could just end up looking wrong.

A big cardboard tube. Hmmm... The possibilities...

This is a common problem for gamers, especially when converting toys, kits, etc. for use in wargaming. It is easily solved, but requires attention to detail. The more detail you're prepared to add, the more believable the scale.

A tray is cut from foamcore.

The engine started out as a large cardboard tube I found in the rubbish pile at work. And let's face it, folks: who hasn't started a project with a cardboard tube before? Such humble items as these are the basic building blocks of our hobby. By Jingo, I've been playing with toilet roll tubes all my life, and I'm proud of it!

Starting to look solid... The tube is glued to the tray and covererd with thin black card.

Ahem. Anyway...

Reinforcing is added. The cardboard strips are scored down the middle to give the impression of two edges abutted together. Doubled rows of rivets will later add to this.

The boiler is a very simple design and took shape fairly quickly, but as I mentioned earlier, it was going to need a lot of detail to make it believable. A key element of Victorian design is its decorrative aspect. I decided to add struts along the base of the boiler, with a repeated pattern of circles that I can pick out later in gold.

The struts, before being glued in place and edged with card strips.

Plastic loops are cut from tubes and glued in a repeating pattern, in front and behind the struts. Similar loops decorate the front of the boiler. Note also tiny struts reinforcing the front edge, and of course the three big coil-type thingummies on top of the boiler.

The struts were cut from card and glued in place, then edged with card strips to give a 'girder' look. This helps to make the machine look bulky.

The front of the boiler benefits from adding the lid of a paint pot, a large washer and various odds and sods from the bits pile. The tubing will eventually connect to a furnace.

Now I started to dig in my Big Box O' Bits for anything I could glue onto the boiler to make it more impressive...

A few details are added. Note the loop design on the front of what will become the smoke stack.

Many strips of card were added, lines were scored to denote steel plates and then... It was time for rivets...!

Lord Smudgington Smythely-Smythe gives up couting rivets and heads off in search of a decent cigar...

And By Harry, they were plentiful!

...and more rivets... I have also added outlets to the 'coils'. These will have guitar-string conduits when done.

I didn't keep track of how many hours I spent gluing on rivets today. It might have made me cry. Suffice it to say that it is a miracle I got the washing up done!

The big block on the end of the boiler will become a huge smokestack - more about that as it develops. For now, it was treated with the same card strips and rivets as the rest of the engine. Larger struts upport its base but follow the same design as before.

From above. Looking pretty impressive, if I say so myself!

So, here comes today's Rivet Count...

When last I posted, the Core-Room was up to 930 rivets. The ladder made for another 30, bringing me up to a nice even 960. But that is nothing, my friends!

As of right now, the engine already has 918 rivets, with many still to add!

So, my total for the project so far stands at 1,848 ! That's more than half of the entire count for HMSW Gargantua - and I've only just started!

Unsurprisingly, I am running out of plastic rod.

Lord Smudgington Smythely-Smythe informs me that he's "quite impressed" so far...

Anyway, more soon!

All the Best!

Monday 7 January 2013

Rivets and Lanterns and Cables! Oh My!

Hi, All!


A sneaky glance through a porthole reveals the almost-completed Core Room...

The madness continues this week, with yet more work on my new walker's Core Room.

A drive-belt is cut from, well, a drive-belt, actually... and glued in place before highlighting with grey to pick out the ridges. This came from the same old printer as many of the cogs I plan to use throughout the walker.

When last I posted, I had completed much of the structure of the room, but still had to add conduits, controls, a gantry and numerous other details. Well, I've been busy.

Guitar-string conduits are added. This is fiddly glue-your-fingers-together-and-swear-a-lot stuff.

...and the other side...

First on the agenda were conduits and a drive-belt, to complete the machinery component of the piece. As with many of my machines, bronze-wound guitar strings came in very handy for this - in a couple of diferent thicknesses. (Or 'E' and 'D', if you prefer...)

Most of the conduits in place. Note also the beginnings of the gantry behind the core.

I had planned and placed numerous sockets for the conduits to run between. Nevertheless, cutting the strings to the right lengths, shaping them and gluing them in place with all the other machinery in the way was tricky work at times.

With the conduits mostly done, I turned my attention to the first of the very special details which will feature in this model - working LED lighting...

LED, peg, and completed lantern. This was quick and simple - essential, as I plan to make dozens of these.

I needed to come up with a quick and easy way to turn dozens of flickering LEDs into gas lamps. Raiding a box of beads and miscellaneous doo-hickeys, I found some plastic peg-board thingummies. "Hmmm," thunk I, "What if I cut these up, shove a pin through to make holes, and do summat right clever?"

The lantern, painted, against an unpainted wall.

So I did.

More LEDs, positioned a little way back from the portholes.

There will be only two visible lanterns in this room, but other LEDs behind the murky glass of the various portholes as well. I don't want to over-light the piece. I want atmosphere. I won't really know what I've got until it's done - fingers crossed! Wiring these will happen later, so I can't show you any shots of the LEDs in action yet - sorry!

One of the side walls, before painting. Yes. Quite a few rivets.

The lanterns were attached to the finished side walls, but the walls could not be glued on yet. First, there were still other details to complete inside the room - the gantry, control levers and a ladder.

The gantry, without handrail.

The main gantry is supported by long girders I built from strips of plastic and studded with rivets. I decided to add a mesh floor, cut from an old seive. This is possibly not very Victorian, but I want light to pass through, and details to be visible.

The handrail is added. Note the smaller gantry opposite, ready for a ladder to the lower deck.

This kind of mesh is not fun to work with! It won't stay flat, folds when you try to cut it, and hurts like buggery when you get bits of it in your sock! But I persevered and the results are quite satisfactory. The painted gantry was finished with a brass handrail.

Levers are made from dress-making pins, bent with pliers. Offcuts of plastic rod and board and a piece of guitar string finish the detail.

I was going a little nuts by this point (rivet count coming, folks... wait for it...) so I decided to throw together some control levers and call it a day - the ladder can wait! These controls were pretty easy to do, being a very simple design.

All in all, since my last post, I have added 368 rivets to this piece, making the Rivet Count so far...

930 !!!

Not a bad start!

Gantries, lanterns, conduits and many, many rivets...

So now it's time to finish this piece (one measly little ladder! How hard can it be?!) and move on to...

The Engine Room!

Lord Smudgington Smythely-Smythe poses beside the immense boiler he has commissioned for the engine...

(Care to take a guess at the rivet count for this one?)

All the Best!