Wednesday 29 February 2012

Accessorise, accessorise, accessorise!

Hi, All!

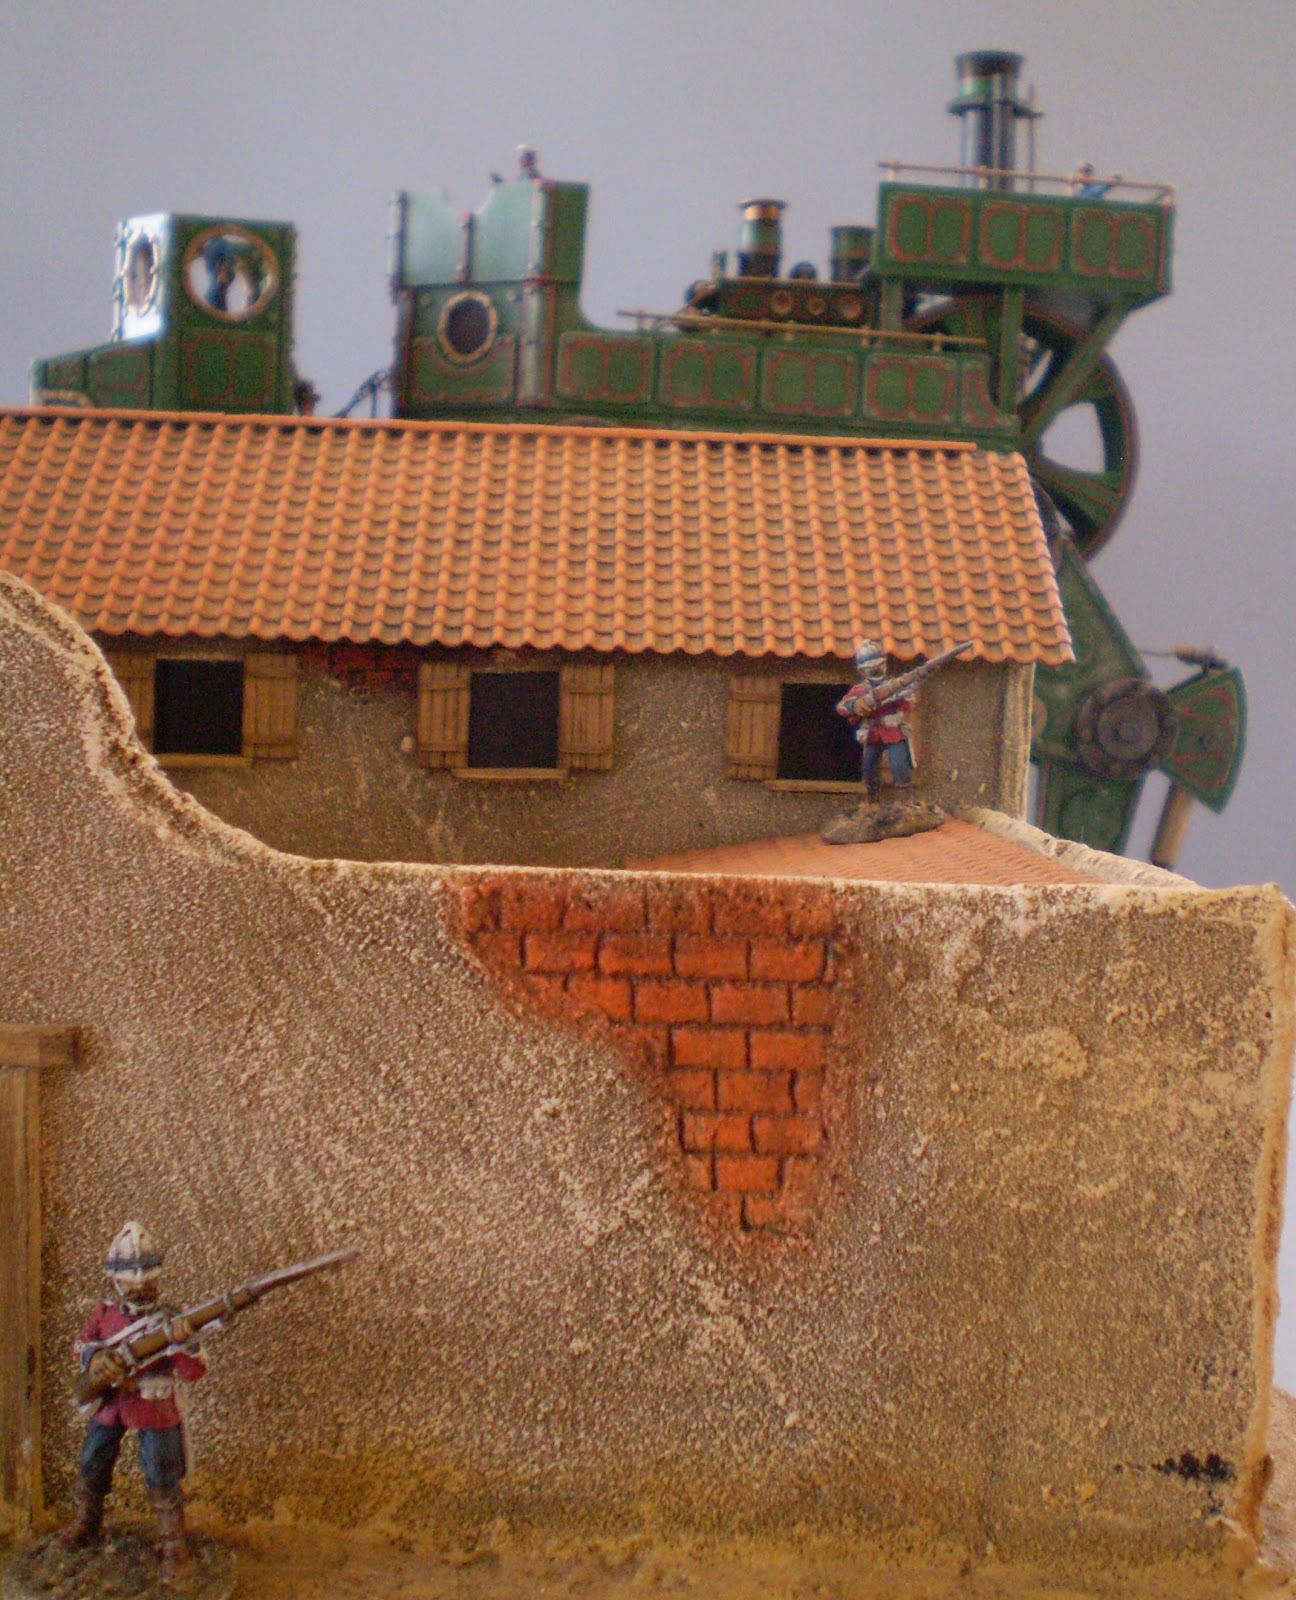
Gatling guns at the ready...

It's been an evening of fiddly bits, and no mistake! You may recall that a couple of days ago, I listed all the little bits I needed to get on with in order to finish HMSW Gargantua - and then proceeded to start a new project!


Well, this evening I knuckled down to it and I can happily report that Gargantua is armed to the teeth!

First up: Control systems.

Instrument panel for the head.

Drive Controls.

I started the control systems a few days ago but got, well, distracted... They are constructed of irrigation bits, plastic tubing, rod and sheet and a little bit of kit bashing from some barely recognisable sprues I found in a box of stuff.

Comparison shot. Chunky, eh?
 Next came a bit of rivet work...

The underside of the raised foot needed some more studs. For God-knows-what reason, I had neglected to add any under the toe, so...

Twelve more rivets! And it's still not enough!
So now, on to the fun part - hand-made Gatling guns!

Left: guns in various stages of production. Right: a finished gun, ready to be painted.

I couldn't see the point in paying for these and waiting ages for them to arrive - and I like a challenge - so I thought I'd give it a go. They are constructed of styrene rod and tube and not much else. The green bobbles are tiny beads my daughter gave me. Constructing the guns was remarkably quick - one hour for all three.

Gunner in place and ready for anything...

While all this was going on, the Faraday Galvanic Field Gun was trying to get my attention, so as the glue was drying on the Gatlings, I quickly refreshed the British officer with a few splashes of ink, pinned his foot and glued him to the firing platform. Easy! And his newly reddened tunic is so splendid, I'll be doing the same for all my boys soon...

Doesn't he look dashing in his new tunic?


So: Back to the accessories!

It didn't take long to undercoat and paint the various bits, add a bit of guitar string to the instrument panel...

Finished instrument panel.

Finished drive controls

Naval Commander (Copplestones) with various bits. Note that one Gatling gun is side-loaded. I couldn't fit it in the vehicle's mouth otherwise!

And glue all the bits in place...

Mouth Gun.

Controls.

Fo'c'sle guns. I love the way these look!

Fo'c'sle guns wth officers.
There you go! Not a bad night's work!

Oh, yes - Rivet Count: 3,552!
 
That's it from me for now. Hope you like!

All the Best!

Monday 27 February 2012

Continuing The Silliness...

Hi, All!

Faraday Gun... I'm rather pleased with this one!

My third post of the day! Good gracious me!

It's been a productive day in Her Majesty's Weapons Reseach Facility. Work has continued on HMSW Gargantua - mainly concentrating on the control systems - but most of my efforts have been diverted into the Faraday Galvanic Field Gun I started last night...

Views from front and sides. I rarely use so many metallic colours, but here it really works. After all, VSF should be bright, shouldn't it?

Let's face it: I was bound to carry on, wasn't I? It's such fun!

I am pleased to report that the gun and carriage are now finished. I hope to add the officer, driver and Big Mike the dinosaur fairly soon. I haven't yet decided how to base this - whether it should be mounted on a long base, complete with Big Mike (which would enable better detailing re: harness, etc.) OR to mount Big Mike on a separate base, allowing greater flexibility.

Comparison shot with Copplestones British Navy. Don't worry - this is definitely an Army gun! The sailor boys will be confined to Gargantua as soon as she is complete!

Oh, the tough decisions a Colonel has to make!

Taken from the rear by a sailor... Hmmm...

Anyway, I hope you like the gun. More soon!

All The Best!

A Bit of Silliness...

Hi, All!

The "Faraday Gun" in production...

Two posts in one day! Whatever has got into me?

I took a break from HMSW Gargantua last night to play with a few bits and bobs. I've had an idea ingering in my head for some time that I'd like to design some sort of weapon using the reflector from an MR16 halogen lamp - I handle thousands of these in my day job...

MR16 halogen lamp reflector. Ooh! Pretty colours!

Anyway, as you do, I started gluing stuff together...

Needs more rivets!

Specifically, this model incorporates:
  • An MR16 lamp
  • A sewing machine foot
  • A die-cast pencil-sharpener wagon
  • Irrigation system bits
  • Styrene board, tubes and rods
  • A toy Edmontosaurus
  • A British Officer from Black Tree
  • A converted wagon driver from Old Glory (I think!) with the head of a British soldier from Black Tree
  • A copper press-stud
  • Cogs from a Twink correction tape dispenser
 I considered having the wagon pulled by a team of mules but they looked rather puny - and anyway, I like dinosaurs! Obviously, I'll be modelling some form of harness onto him.

Green Stuff is required to finish the driver. Brass cables and tubes will also be added after painting.

This shouldn't take long to paint, so I'll soon have a Galvanic Field Gun with which to pound the enemies of Empire!

Oh, yes... I should probably mention that I have so far added 119 rivets!

Huzzah!

All The Best!

The Beginning of the End

Hi, All!

HMSW Gargantua on a training exercise with the garrison of Tzu-I-Saed Mission.

Here we go then: the final detailing of HMSW Gargantua has begun. The structure is complete, the crew are ready. It's nearly time...

Steps will extend from the bare metal plate in the Main Deck to the Aft Deck, above the flywheel.

For those of you who are interested, the following details need to be added before this rather long-winded project can be considered done:

  • Handrails (or chains) on the Rear Deck, around the engine.
  • Rope ladder from the Aft Gallery.
  • Steps between the Main Deck and the Rear Deck.
  • Guns mounted on Fo'c'sle and in the 'mouth'.
  • A Union Jack.
  • Coal in the coal bunker.
  • Glass in the portholes.
  • Control panels, dials, levers, etc. in the head.
  • Extra studs under the raised Front Port Foot.
  • Green stuff to seal valves.
  • A clear (discreet) support under Front Port Foot.
  • A name plate.
  • Yorkshire Roses and other British markings.
  • Brass paint to touch up on pistons.
 So not much, then...

Glass will be fitted to the portholes and instrument panels designed for inside the head.
The Aft Gallery, almost complete.

Since my last post, little has been done but today's the day! I have already added a handrail and tread boards on the Aft Gallery, incorporating a further 22 rivets, bringing the rivet count to:
  
3,486!

And I daresay there will be more. I'll keep you posted as things develop.

Shhh! Engage Stealth Mode!

Check out my next post for some model making silliness I indulged in last night...

All The Best!

Wednesday 22 February 2012

Behold My Rear Entrance!

Hi, All!

Seems a little naked back there, doesn't it?

Ooh! I've been waiting months to use that line!

Extreme close-up! The last bit of plain, unadorned plastic will soon be gone...

As you can see, this evening's efforts have been directed towards HMSW Gargantua's aft hatch. As far as the structure of the model is concerned, this is the last bit - and I've been puting it off, mainly because I wasn't really sure what I wanted it to look like.

Details and rivets start to go on... The underside of the chimney forms the canopy.

Anyway, it's finally come together tonight. I decided some time ago that I wanted a very nautical feel, so I built a locking mechanism to suit using half of a plastic press-stud and a bit of wire. This kind of mechanism is, of course, correctly known as a trundley-trundley-clunk lock...

A quick coat of paint...

As I was suffering rivet withdrawal symptoms due to the shock of running out of plastic rod yesterday, I made sure to get a good dose tonight. Sixty-eight more, to be precise. It still surprises me sometimes to see the difference in depth and character a few such simple details can make. It's very satisfying to watch such a transformation take place as you work.

The view from beneath...

The girders protruding from the back will support iron tread-boards very similar to those of the chain bridge in the neck. (See: So Many Projects, So Little Time - 29th August, 2011). There will also be a handrail and a ladder. But first, all of what you see here had to be finished. I won't be able to get a brush in there once the final details are in place. Sadly, the red detailing is not as straight as I would like - I can't pick up and hold the model to paint details anymore, so I had to stand it on a table and work at almost full brush length. Awkward.

Flywheel, chimney, aft-hatch and rear upper legs, from behind.

So there you have it: one step closer to completion!

Rivet Count: 3,464!

More soon...


All The Best!

Monday 20 February 2012

Two Feet Deeper In...

Hi, All!

She's finally looking  like she means business!

Well, I feel the construction of HMSW Gargantua has reached a significant milestone today. All of the various bits and pieces I featured in my last post are now in place and the legs are all but finished! I have only to add a few bolts here and there to disguise the pins that hold it all together, and touch up a little paint...

All pistons and hoses are now complete. Shame the underbelly is hidden away, innit?

Of course, there is still a lot of detailing to do - nameplates, flags, steps, railings, window glass, head controls, weaponry, and the back gallery which (as yet) is the only part of the model to remain almost totally untouched. But she's certainly looking (structurally) pretty much done...

Nearly ready to stomp on some demmed troublesome fuzzy wuzzies!

Not that I would dream of fielding her until she's absolutely perfect...

The rear feet... Hmmm. Identical to the front feet! This is insanity!

In order to get the lower pistons behind the rear legs, I had to construct support fins - the reversed design of the legs meant that mirroring the front ones would bring the piston in front of the 'shin' and anchor it to the top of the foot, rather than the heel. A bit of head scratching ensued...

Rear piston support-fins in place. Sorry about the poor focus! Note the suspicious grey and white blank bit by the flywheel - this is the back hatch, where the rear gallery will soon be constructed...

Believe it or not, a lot of this stuff is surprisingly quick to do, once you get the hang of it. Rivets, for example, are easy so long as you're listening to some decent music (thank you, Mr Bowie) and the rear feet took far less time than the front ones.

No reason at all to add this shot. I just like looking at all the workings!

Now... The moment you may or may not have been waiting for...


Rivet Count: 3,396!

Still think she looks like a cute little pooch?

And people call me crazy! Hahahahaha!

More soon.

All The Best!

Sunday 19 February 2012

Lots O' Little Bits...

Hi, All!

Hmmm... The beginnings of a fleet..? Mwahaha!

It's been a pretty full-on Sunday. A strenuous bushwalk at 7am, a disastrous gunfight in Leadwood with Notorious Greg, a nice bottle of Pinot Noir to accompany chilli and nachos and, of course, lots of bits of plastic, glue and paint.

Pistons, transmission valves, rear-lower-leg piston-support fins, ankle-axles, and feet in the making...

What you see before you are numerous components that have to be made and painted before they can be fixed onto HMSW Gargantua. All of these are parts of the rear leg assemblies.

Port-side rear thigh piston beside flywheel.

It's fiddly stuff, but I can really see light at the end of this particular tunnel. I'm fast running out of materials, so now I've entered the "innovate or spend more cash" phase of the project. And not for the first time! Oh, well. Necessity is the mother of invention, n'est pas? Great things may occur!

The slowly developing feet, in place...

...and the whole walker...

Anyway, it's been a while since I included any comparison shots, so here are a few. My naval-types are raring to get into the fray, albeit in front of a bluescreen tonight, rather than some dramatic and breathtaking panorama of exotic lands far away. It was that or the dining room table...

Hmmm... The British Empire Strikes Back..?

And I used to think this vessel was big!

Funnily enough, the whole reason I started HMSW Gargantua was the positive response my now seemingly small and insignificant two-legged walker received on this blog. Whatever next? Another one?

Actually, I do have plans for a new vehicle - but I'm not saying any more than that! In the meantime, I need a name for the smaller walker pictured here. HMSW...? Anyone got any smart ideas?

Still nameless! Such a neglectful Colonel!

More soon!

All the Best!

Monday 13 February 2012

She Got Leeegs....

Hi All

Pretty scary, huh? Now, where are those Prussian spies?

Well, it's finally happened... Me legs are on!

More correctly, HMSW Gargantua now has all four legs, albeit bereft of pistons and a few other bits here and there, but she's certainly starting to look finished.

The back legs. Feet are unfinished and pistons are missing, but you get the idea...

I have to admit, I'll be mightily pleased when this project is over. It's taken far too long, what with one thing and another, and I'd like to do some much simpler stuff for a bit. Nevertheless, I'm a proud Colonel...

The last thing Her Majesty's enemies will ever see...

Hmmm. Perhaps I'm getting ahead of myself. There are still a lot of things to do... Gatling guns, flags, name plates, controls, steps to the top deck, the back door and gallery...

More pistons to be added here...

Oh well. Back to the grind. Enjoy!

The view from above. Looking pretty ship-shape now.


All The Best!

(p.s... sorry about the picture quality this week - my camera died, so I had to use my phone!)