Thursday, 16 April 2015

I Spy With My Beady Eye...

Hi, All!

The Nefarious Doktor Nefarious surveys the ruins of Ah-Pul-Sh'Napps with his towering automated bodyguard.

Coming from a long and proud military heritage as I possibly do, I often find it impossible to resist the urge to rummage through boxes of brightly coloured plastic beads.

If any of you are Sandhurst men, I'm sure you understand...

Beads, Sir. Dozens of 'em.

Anyway, I was cheerfully rummaging away the other day, intermittently humming 'Rule Britannia' and having a delightful conversation with myself about the shocking price of cheese these days (as one does) when I gasped in astonishment!

"Gasp! I'm astonished!" I gasped astonishedly, "That there pink beady-thingy looks exactly like the torso of one of those late nineteenth-century steam-driven self-motorvating legionnaries what gave our lads such a hard time!"

And of course, I was right. Keep reading - I can prove it.

The 'torso' beads are trimmed into shape to create a neck line, and abdomen and hip beads are attached. Neck pins are shoved into heads...

And so, I present to you another of The Nefarious Machinations of the Nefarious Doktor Nefarious...

The Legion of Steam-Driven War-tomata!

(not to be confused with your salad.)
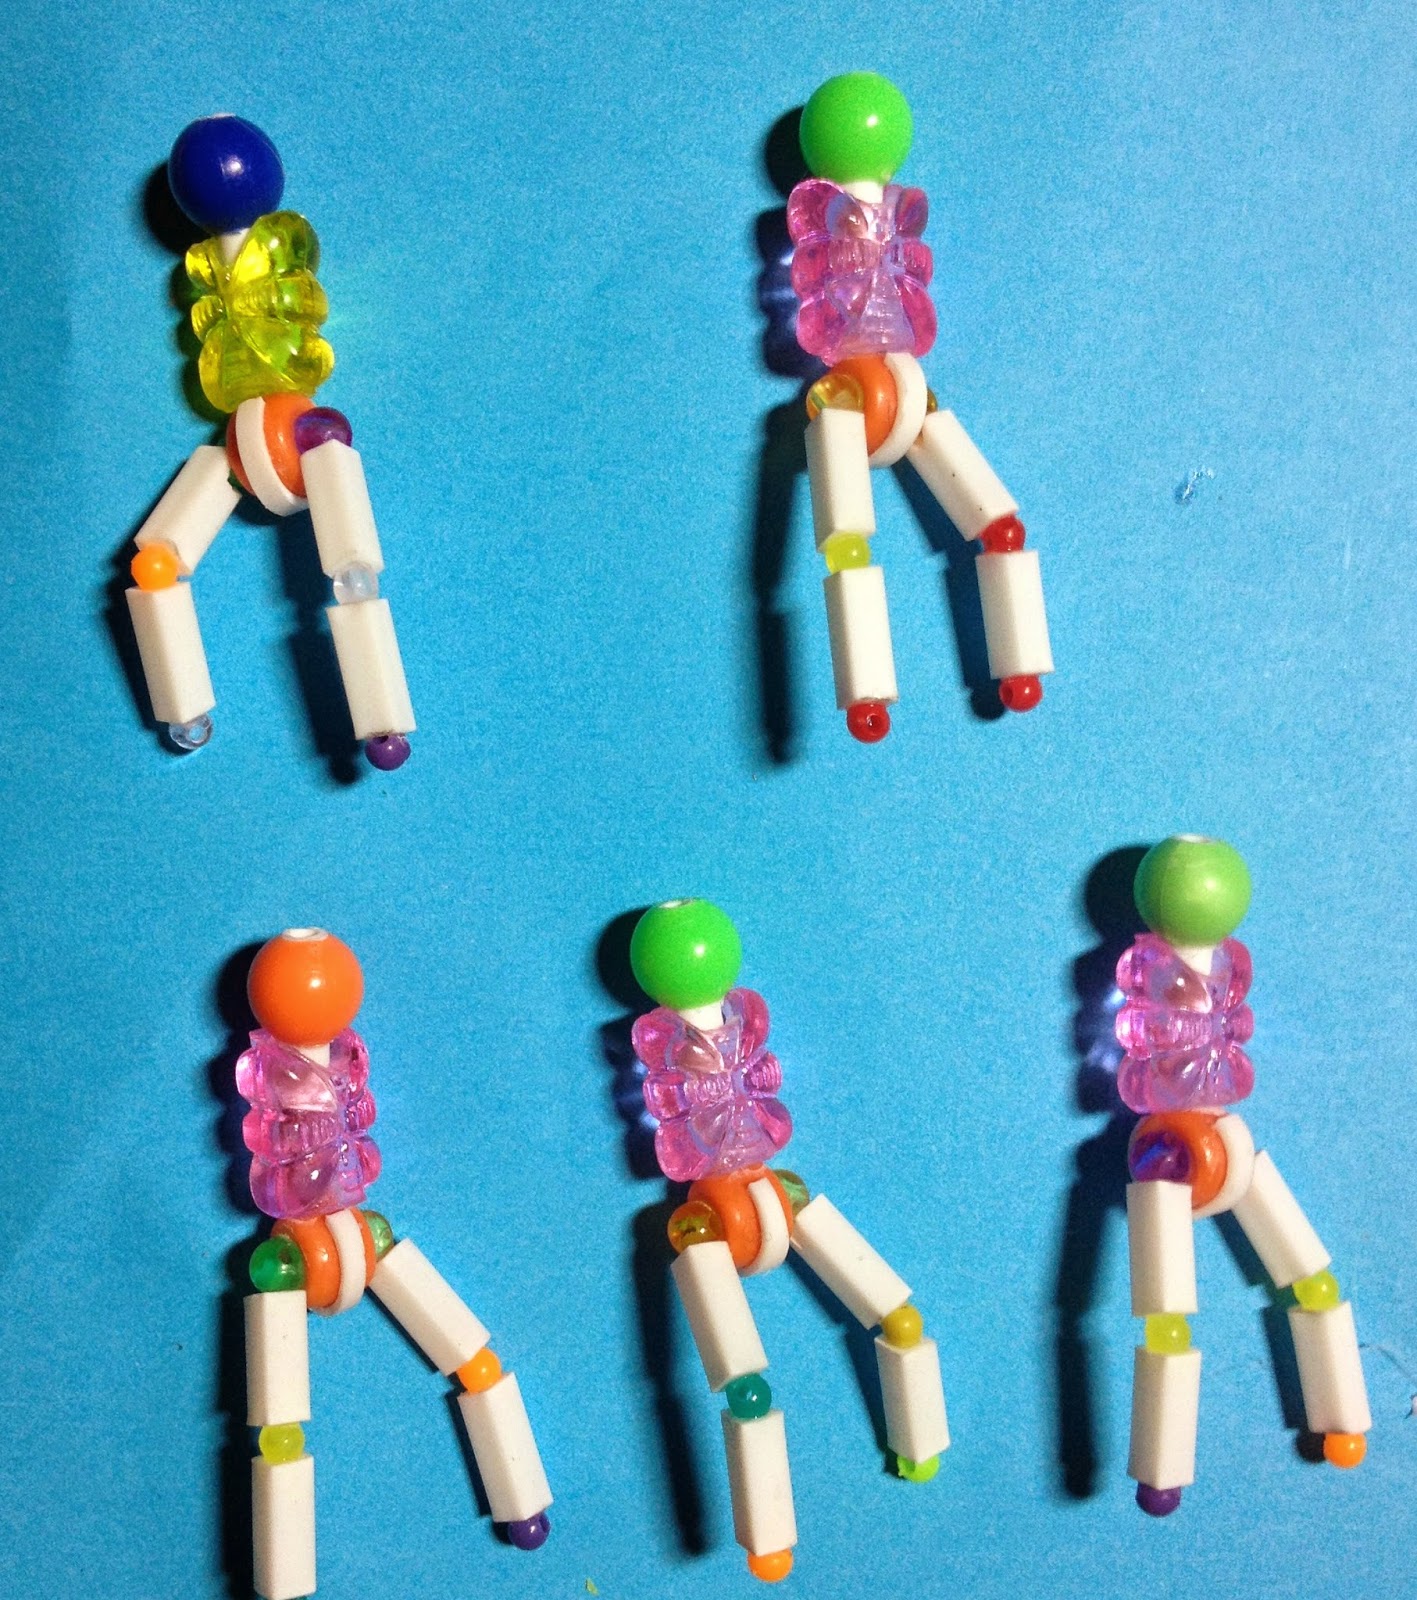
3.2mm square tube is cut to create leg sections, jointed with tiny round beads.

This little gang was a nice distraction from Lord Smudgington Smythely-Smythe's Hydraulically-Motorvated Sextupedal Land-Traversing Vacational Domicile (more on that very soon) and were also super cheap to create.

Trangular sections are cut from square tube to create the feet. The squad is glued to washers, with packing under some feet to support action poses.

As you can see, I used little round beads for all of the joints. By so doing, I gave myself limitless options for poses. I wanted the unit to look dynamic and active - not your typical rigid robot-soldier poses.

Rivets and rods are added to 'flesh out' the legs. The same detailing will be added to the arms. The hips are armoured with plastic tube.

Arms are added, and shoulder armour is cut from round plastic tube.

These were fast and fun to build, although making ten of them for the sake of fielding a full squad was almost a drag at times.The lengths of plastic rod lining the arms and legs were the trickiest and most time-consuming part but they really bulk up the models.

Ray guns are put together from 1mm plastic rod, diamond-shaped beads and tiny rouns ones. Model-making doesn't get simpler than this!

'Hands' in place. The models are almost finished.

I wondered about hands, and decided to go for a simple claw on one arm and ray gun on the other. After all, these are supposed to be Victorianised Retro-Robots... Whatever those might be!

A finished War-tomaton, ready for painting. The crest on his head is a slice of plastic tube, cut open and stretched into place.

Centurion (note ribbed shoulder and diamond-emblem on his head); NCO (round emblem on head); and Legionary. The chimneys (and boilers) were made from plastic tube and a tubular bead.

I think these do rather well as 1960s-style robots with a VSF twist anyway.

The Centurion.

NCO (left) and Legionary (right)

The finished unit was given a simple paint job of copper with gold details, green eyes and red ray guns. Easy!

The completed unit, ready to smash all who stand in their way!

So there you go: Fast, Cheap, Simple and Dangerous!

The Nefarious Doktor Nefarious leads his warriors to assured victory.

Next post: More on Lord Smudgington Smythely-Smythe's Hydraulically-Motorvated Sextupedal Land-Traversing Vacational Domicile (... I'm really getting bored of typing that...) and TWO more super-duper-secret side projects coming soon!

All the Best!


Sunday, 5 April 2015

Lions to Port!

Hi, All!

The port-side mid-deck is completed!

Over the last two weeks I have been slogging away at the port-side mid-deck galleries of the engine room section of Lord Smudgington Smythely-Smythe's Hydraulically Motorvated Sextupedal Land-Traversing Vacational Domicile. And what a slog it has been!

As with the starboard side, the entire support structure is cut out, to be replaced.

As I mentioned in my last post, I decided to try building this part as a single piece, in order to keep things looking consistent, straight, coherent and so on... What I hadn't accounted for was the massive amount of work this would entail.

The for'ard section is design with an arch to echo the bulkhead-buttresses of the main deck.

Checking the construction against the model,

Somehow during the last two weeks, I have been unable to find it in me to embark upon another fouteen hour stint of rivetting, soldering, painting and muttering to myself, hence the lack of a progress report until now.

I think I may return to a schedule of bite-sized pieces!

A blank ceiling is cut to act as a guide when aligning the mid-deck to the deck above. A ladder will descend from above, all the way to the lower deck.

Anyway, somewhat later than I had hoped, I have now completed this stage of the model, and more significantly, I have almost finished the engine section. I will soon be moving on to the mansion!

The shaft starts to take shape.

When I designed this section I wanted to keep it similar to the starboard side, but to add a couple of new elements. There were also game-play considerations such as access to all areas from the main deck. I thought it might be nice to see light coming up from below through a shaft with a ladder, so I set myself the task of dropping a ladder from the top deck all the way down, with visible floorboards and a hidden light source at the bottom. Another ladder will eventually link to the rear area from above.

A large array of pieces had to be constructed, detailed and riveted before piecing together the whole 'kit'.

The rear port mid-deck gallery, ready for assembly.

It was very handy to work with a lot of pieces at once, in that I could constantly check that everything was going to fit properly, but it was a lot of work! When it came to the rivetting stage, I really had to push myself to keep going!

The for'ard section, pre-rivetting...

...and after painting. Ceiling, hand rails, lamp post and ladder have yet to be added.

Then there were the lights... This piece added thirteen concealed LEDs and three working lamp posts, and I really hate soldering! There is now a huge amount of wiring hidden in this model. If it ever breaks down, I will not be able to fix it.

The finished ceiling. The holes for the ladders had to be precisely checked against the deck above.


The whole assembly was unified by building the ceiling as a single piece, to which I glued the finished components, working upside-down. When all the wiring was done, the finished section was put into place and the ladder was dropped in. Finally, a frame and hand rail were added around the top of the ladder.


The finished deck, in place.

And there you go. Simple, innit?
The ladder drops away through the decks.
A gas-lamp glow illuminates the depths of the vessel.
Which brings me to the Rivet Count:

In this section, I added a total of  891 rivets to the model, bringing the total so far to:

13,569 !

Not bad. Looking forward to the twenty-thousand mark now!

The for'ard gallery by lamp light.

The main deck is starting to look quite busy now!

The rear section, still waiting for a ladder.

The ladder casts pleasing shadows against the bulkheads, while yet another hand-made lantern cheerfully flickers.

"But why Lions?" I hear you think...

Well, calm down and I shall tell you.

A Nefarious-looking armoured vehicle joins the ranks of the Wutha-F'Kahwi tribe...
I got a bit distracted during the last couple of weeks, possibly out of the need to do something relatively quick, simple, silly and entertaining. And it's been quite a while since The Nefarious Doctor Nefarious and his Wutha-F'Kahwi allies caused any trouble...

Lions: They look like cannons really, don't they?

I had found in a local crap shop a soft orange plastic lion's head that looked like fun. With cheerful abandon, I shoved a length of tube down its throat, punched a hole in its cranium and proceeded to turn it into mobile artillery.

An eccentric-looking tribesman with looted and decorated pith helmet, goggles and telescope.

Why not?

The heavily riveted vehice.

Boiler and copper chimney complete the archaic look.
 
Sadly, somewhere along the way, I have managed to delete all of the build-progress photos I took, but here are the results. The chassis was made from plastic board off-cuts, around a wild west pencil sharpener wagon.

The cheap plastic lion's head turned out rather well, I think!

This little beast is the latest creation of The Nefarious Doctor Nefarious: given by him to a local Wutha-F'Kahwi chieftain in order to further destabilise British rule on the Lost Continent. Or that's my excuse, anyway.

Boasting only 391 rivets, it's just a little fellow - but I hope you like it.

The Wutha-F'Kahwi advance.

Anyway, that's all for now!

All the Best!

Monday, 23 March 2015

Rivets To Starboard!

Hi, All!

A peaceful evening on board Lord Smudgington Smythely-Smythe's Hydraulically-Motorvated Sextupedal Land-Traversing Vactional Domicile.

When one dives into any project with little to no forward planning and a vague intention to invent as one goes along (as one frequently does - well, this one anyway!) one runs the risk of creating a lot of work for oneself.

Doesn't one?

The entire starboard side is pulled apart.

So it is with Lord Smudgington Smythely-Smythe's Hydraulically-Motorvated Sextupedal Land-Traversing Vactional Domicile.

In particular, one suffers a constant onslaught of new and better ideas, which one attempts to incorporate, potentially resulting in a lack of design consistency and the occasional wobbly bit.

The engine section is glued to its board and a basic cardboard blank is fitted to the leg bay.

So it's a good job one doesn't really care. Nevertheless, some of you out there might (and probably should) so please feel free to learn from my haphazard and eccentric approach to miniature engineering.

I meant to write this blog post last night, but following a fourteen hour session of cutting, gluing, soldering, painting, wood-staining, photographing and of course rivetting, I could take no more. My apologies for not putting in the effort!

Holes are cut for ladders (later) and marked against the ceiling pieces of the mid-deck sections below.

I realised that having made the decision a week or two back to open out the mid-deck section, the support structure I had previously built from foam core because it is lightweight, strong and relatively cheap would no longer do the job. Being thick, it was too bulky to even remotely accurately represent scale, and it would not provide a crisp, clear line to the hull.

It had to go.

So, with jollity, coffee and a big knife, I hacked my vessel to bits, then realised I had removed all reference points, front to back, up to down, starboard to port... "Oh, whoops," quoth I.

New sections are built and tried in place.

Fortunately, I had not yet glued the engine room to the base board I had cut to eventually sit on top of the whole-vehicle chassis. (The keen eyed and pedantic amongst you will note that I previously, incorrectly, referred to this as a 'fuselage'. Please shush.) This meant that I was able to create a 'blank' compartment for the leg bay (where the leg will eventually go - get it?) and then restructure the entire starboard side around this. It also meant that I could turn the aforementioned base board around, effectively moving the leg bay backwards, to where it looks more fitting.

So it wasn't all bad.

The two pieces are joined with a bridging piece, giving greater rigidity and linear accuracy than if I was to continue building a section at a time.

Thus, although I had planned to construct just the rear-most starboard mid-deck section, I actually found myself rebuilding the entire starboard mid-deck as a single piece. Port will soon follow the same process.

A lamp-post is inserted into the painted piece, after first applying a balsa floor.

I am confident that in so doing, I will achieve cleaner lines, greater strength, and better consistency of design.

So there.

The finished piece, ready to insert. Lanterns have been wired and glued-in. Frosted acetate 'glass' is behind the portholes to catch the light of concealed LEDs within the model.

The various parts you see here were constructed as previously described in earlier posts, so I won't bore you. Needless to say, there will be a lot more of this kind of repetitive work, so I'll do my best to keep you all entertained with pretty pictures!
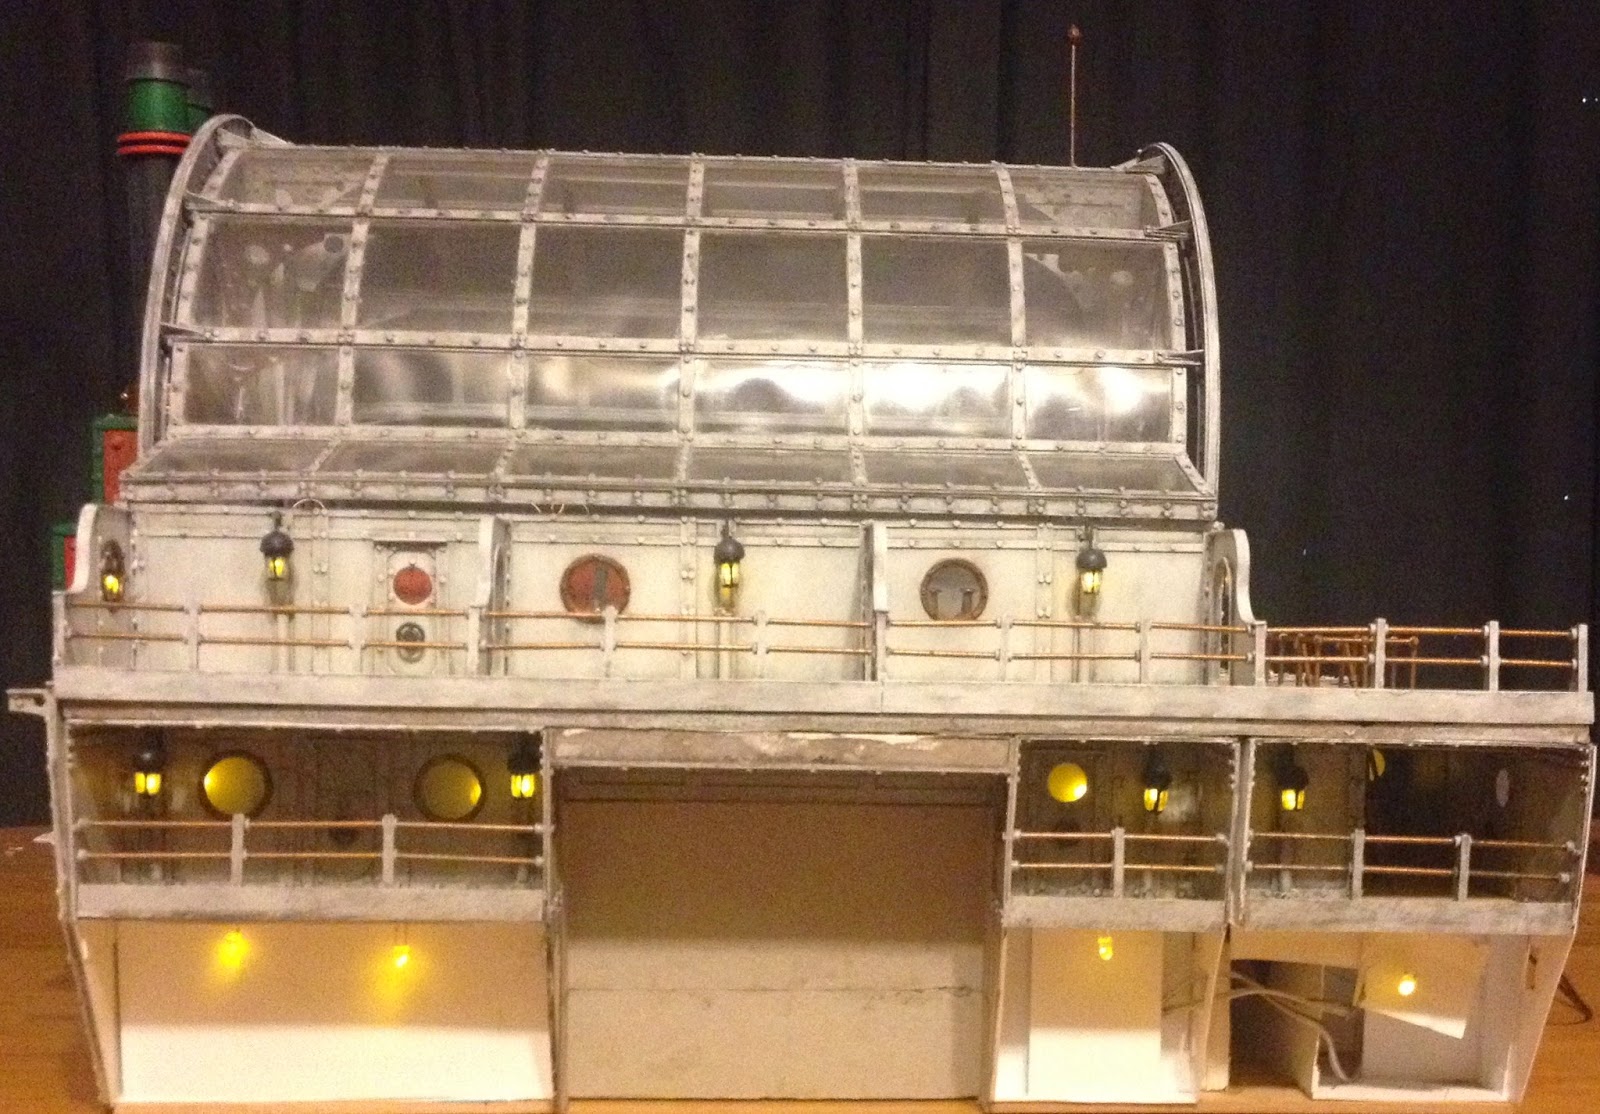
The rear section, in place. LEDs have been installed in the lower deck, in preparation for later.

Looking forward. The cardboard blank in the leg bay will eventually be hidden.

But before the eye-candy, the Rivet Count!

I have added a total of 559 rivets this week, bringing Lord Smudgington Smythely-Smythe's Hydraulically-Motorvated Sextupedal Land-Traversing Vactional Domicile to...

12,678 rivets!

Not content to take my word for it, an over-zealous officer starts counting...


And... as a nice numerical aside, Colonel O'Truth's Miniature Issues has just passed 150,000 hits! So a huge thank you to all you splendid chaps and chapesses!

The starboard side so far.

So without further ado, here are some more nice pictures! Huzzah!


Next week, I'll endeavour to make a good go of the port side mid-deck, and I'll be discussing the remarkable similarities between giant severed lions' heads and late nineteenth-century steam-driven artillery.

All the Best!