 |
| A peaceful evening on board Lord Smudgington Smythely-Smythe's Hydraulically-Motorvated Sextupedal Land-Traversing Vactional Domicile. |
When one dives into any project with little to no forward planning and a vague intention to invent as one goes along (as one frequently does - well, this one anyway!) one runs the risk of creating a lot of work for oneself.
Doesn't one?
 |
| The entire starboard side is pulled apart. |
So it is with Lord Smudgington Smythely-Smythe's Hydraulically-Motorvated Sextupedal Land-Traversing Vactional Domicile.
In particular, one suffers a constant onslaught of new and better ideas, which one attempts to incorporate, potentially resulting in a lack of design consistency and the occasional wobbly bit.
 |
| The engine section is glued to its board and a basic cardboard blank is fitted to the leg bay. |
So it's a good job one doesn't really care. Nevertheless, some of you out there might (and probably should) so please feel free to learn from my haphazard and eccentric approach to miniature engineering.
I meant to write this blog post last night, but following a fourteen hour session of cutting, gluing, soldering, painting, wood-staining, photographing and of course rivetting, I could take no more. My apologies for not putting in the effort!
 |
| Holes are cut for ladders (later) and marked against the ceiling pieces of the mid-deck sections below. |
I realised that having made the decision a week or two back to open out the mid-deck section, the support structure I had previously built from foam core because it is lightweight, strong and relatively cheap would no longer do the job. Being thick, it was too bulky to even remotely accurately represent scale, and it would not provide a crisp, clear line to the hull.
It had to go.
So, with jollity, coffee and a big knife, I hacked my vessel to bits, then realised I had removed all reference points, front to back, up to down, starboard to port... "Oh, whoops," quoth I.
 |
| New sections are built and tried in place. |
Fortunately, I had not yet glued the engine room to the base board I had cut to eventually sit on top of the whole-vehicle chassis. (The keen eyed and pedantic amongst you will note that I previously, incorrectly, referred to this as a 'fuselage'. Please shush.) This meant that I was able to create a 'blank' compartment for the leg bay (where the leg will eventually go - get it?) and then restructure the entire starboard side around this. It also meant that I could turn the aforementioned base board around, effectively moving the leg bay backwards, to where it looks more fitting.
So it wasn't all bad.
 |
| The two pieces are joined with a bridging piece, giving greater rigidity and linear accuracy than if I was to continue building a section at a time. |
Thus, although I had planned to construct just the rear-most starboard mid-deck section, I actually found myself rebuilding the entire starboard mid-deck as a single piece. Port will soon follow the same process.
 |
| A lamp-post is inserted into the painted piece, after first applying a balsa floor. |
I am confident that in so doing, I will achieve cleaner lines, greater strength, and better consistency of design.
So there.
 |
| The finished piece, ready to insert. Lanterns have been wired and glued-in. Frosted acetate 'glass' is behind the portholes to catch the light of concealed LEDs within the model. |
The various parts you see here were constructed as previously described in earlier posts, so I won't bore you. Needless to say, there will be a lot more of this kind of repetitive work, so I'll do my best to keep you all entertained with pretty pictures!
 |
| The rear section, in place. LEDs have been installed in the lower deck, in preparation for later. |
 |
| Looking forward. The cardboard blank in the leg bay will eventually be hidden. |
But before the eye-candy, the Rivet Count!
I have added a total of 559 rivets this week, bringing Lord Smudgington Smythely-Smythe's Hydraulically-Motorvated Sextupedal Land-Traversing Vactional Domicile to...
12,678 rivets!
 |
| Not content to take my word for it, an over-zealous officer starts counting... |
And... as a nice numerical aside, Colonel O'Truth's Miniature Issues has just passed 150,000 hits! So a huge thank you to all you splendid chaps and chapesses!
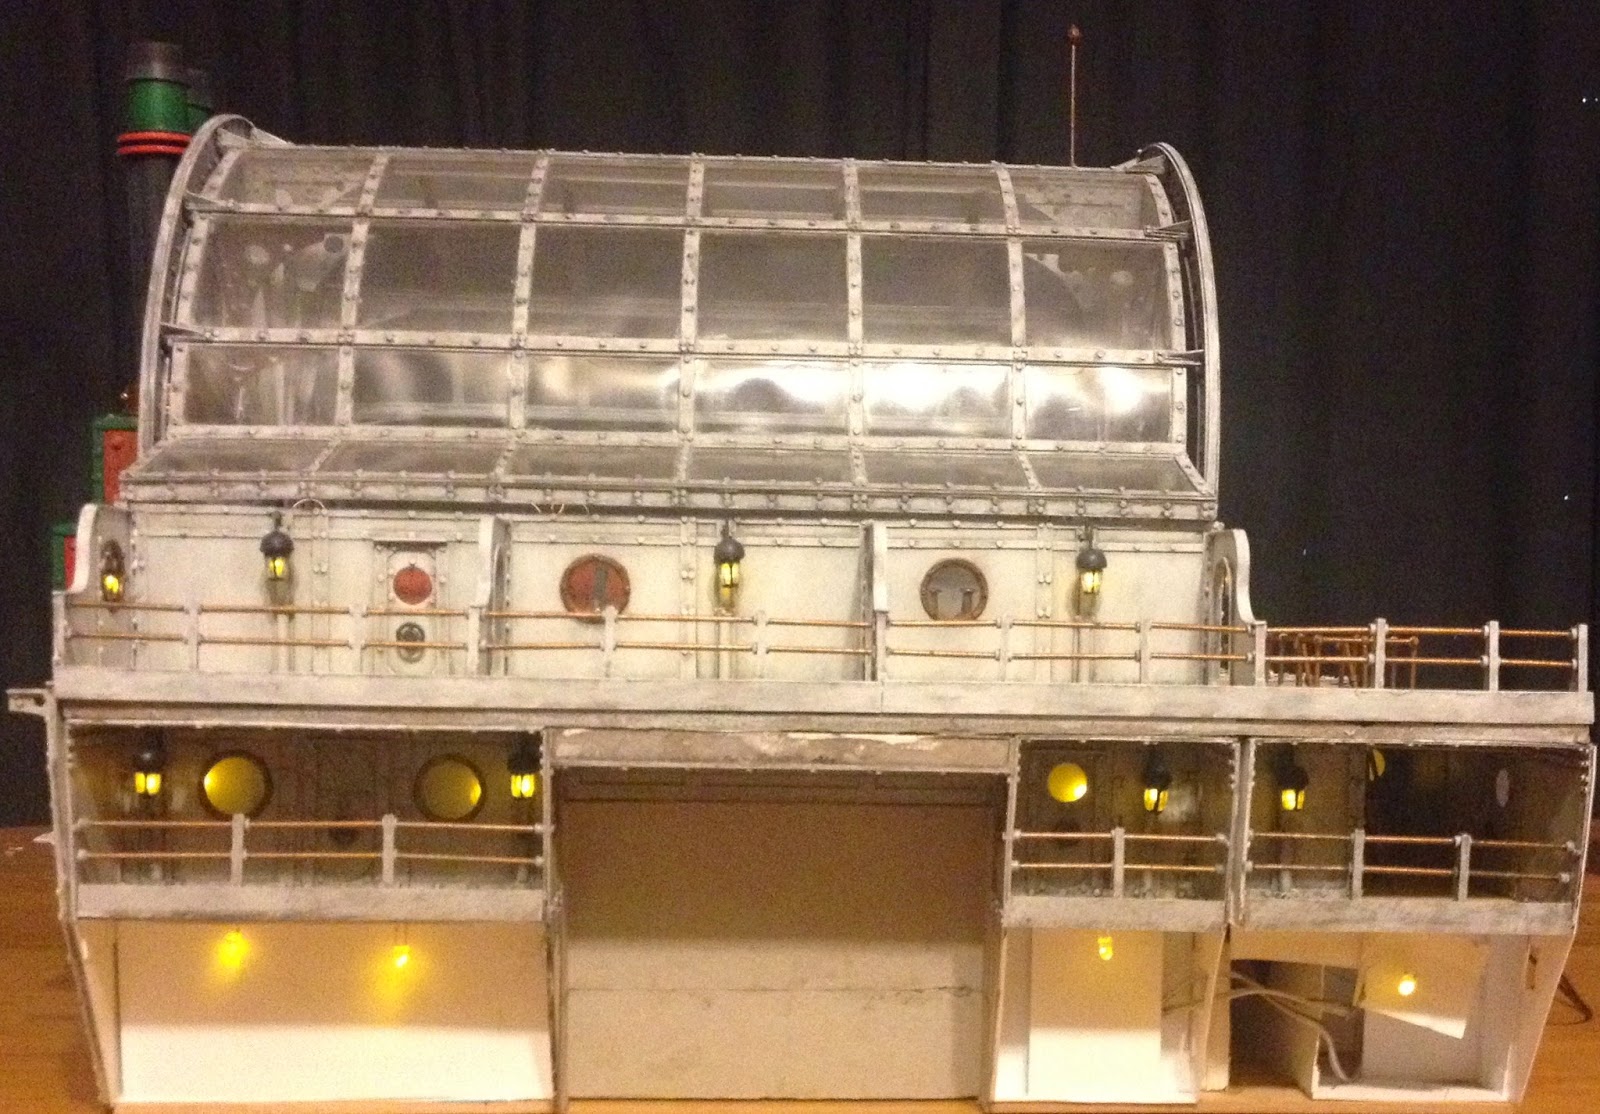 |
| The starboard side so far. |
So without further ado, here are some more nice pictures! Huzzah!


Next week, I'll endeavour to make a good go of the port side mid-deck, and I'll be discussing the remarkable similarities between giant severed lions' heads and late nineteenth-century steam-driven artillery.
All the Best!
It looks absolutely incredible. The attention to detail is mind-boggling...as is the amount of work that you've put in!
ReplyDeleteThanks, Gordon - but please don't remind me! I doubt I'm even 20% done yet!
DeleteStunning job, details are amazing!
ReplyDeleteThanks Phil! Of course, up close you can see it's all just play-doh and wax crayons.
DeleteCall me a pedant...but have you removed from the rivet total, those rivets attached to the amputation? These changes are giving the whole thing more depth, and 'believability'! Fantastic.
ReplyDeleteMy good man, I have deducted rivets where deduction was deductable.
DeleteSuspension of disbelief (or the chassis, as in this case) is a challenge when constructing a 200 feet-long steam driven walker, circa 1880. I'm pleased to see you are easily fooled!
Thank you!
It's a bit good, that! ;)
ReplyDeleteThat's all right then!
DeleteKeep up the good work Sir, I can commiserate... I have been 'chained' to hobby desk myself for hours on end it seems recently as I deal with many large Turkish gentlemen...
ReplyDeleteThanks Scott.
DeleteI didn't get involved in that particular project, as I am violently allergic to anything resembling historical accuracy.